Showing posts with label house decor. Show all posts

Thursday, October 27, 2011

Buffet Redo

So my Mom and sister decided to do some changes to her house this weekend. They found a beautiful buffet at the Salvation Army. It was in need of a little work and I think it turned out amazing! Take a look for yourself.

Before:

And the beautiful after: 
Such a great transformation. If you want my tutorial for the Pottery Barn Numbers Art Knock-Off you can find it here. And if you like that cute little twine spool I'll be posting a tutorial soon. I used them in my wedding decor!

Have a fabulous day!


Sunday, October 31, 2010

Pottery Barn Knock-Off: Painted Numbers Canvas

When I saw this on Pottery Barn's website I knew that it would be perfect for my sister. It's totally her style. It's not for sale through the website anymore, but I can only imagine the price tag on something like this!
Photos from Pottery Barn here.

So, I decided that I should just make my own! I used a 20x16 canvas that I got at a garage sale for $2. I read on Little Blue Boo's blog about mod podging newspaper or phone book pages on your canvas to be able to sand it down at the end, and give it a more rustic and distressed finish.
 Here's what it looked like after it was covered in phone book pages.
 Then, I painted over the whole thing in an antique white acrylic paint. When that was dry I went over that with a bright white acrylic paint. I didn't cover the whole thing, but more in random places to give it a streaky effect.
 Once that was completely dry, I found my center and drew lines in pencil so that I could work in sections. For the numbers I used my Silhouette to cut out vinyl letters. I google searched "Pottery Barn Numbers Canvas Font" just to see if anyone knew which font they were. Lucky for me, Stephanie Lynn over at Under the Table and Dreaming had made a cute mini version and told us what fonts she used to make hers. So, I played around with mine until I liked it the best. I ended up using two fonts: Engravers MT and Century Schoolbook. I typed them into word and then went back and forth between my document and the picture that I had from Pottery Barn to decide which number fit best.
 I kept working in sections to make sure that all of my numbers fit correctly.
After I got all of the numbers places where I wanted them I used my brayer to make sure that all the edges were really stuck well. At this point I was busting at the seams to go spray paint it and see what the finished product would look like! 
I took it outside and gave it two good coats of flat black spray paint. I made sure it was completely dry and then brought it in and peeled away the vinyl letters! Loved it! But I knew I would love it better after I sanded it. I just used a piece of fine grit sandpaper, wrapped it around a block, and really hit the edges and where my phone book pages were a little crinkled.
 I was so super happy with it!
 I had to test it in my house before I gave it to my sister. I thought for a minute that I should just keep it!! :) Just kidding! I love the way the edges look and the crinkles. It really makes it look like a sheet of canvas.
Take that Pottery Barn!

Linking to:
UndertheTableandDreaming Join us Saturdays at tatertotsandjello.com for the weekend wrap up party!
Making 


Funky Junk's Saturday Nite Special


Monday, October 18, 2010

DIY Cake Stand

Using a few basic supplies, you can make your own cake stand! I found this orange candle stick at a garage sale for 25 cents!! The plate is one from the wedding section at Dollar Tree! Using some E-6000, just stick them right together!
After it dried overnight, I spray painted it glossy white! I added a clear acrylic sealer after that was dry.
Super cute right? It's the perfect little stand for some good fall decorations. I think if I wanted to put food on it, I would add a little piece of scrapbook paper cut to fit.
I love an easy project! 

Wednesday, October 13, 2010

Fall Mantle

My fall mantle has been up for a couple of weeks, I just hadn't taken pictures of it for some reason.  The color block piece that you see on the right was taken from Jennifer at Hope Studios tutorial on a Paint Chip Mosaic. It's made out of paint chip samples for a home improvement store! Go check out her tutorial on how to make this super inexpensive artwork! Today I wanted to show you how I made my leaf art. First, I bought a certificate frame from, where else, Dollar Tree.
I spray painted the frame black. I removed the cardboard center and hot glued burlap to it.
Then, I cut out a leaf using my Silhouette onto cardstock as a stencil.
Silhouette Image Leaf_0476
Then, I used the saran wrap technique to apply my orange acrylic paint. I think by using the saran wrap, it doesn't give it such a "perfect" look. More like and aged, or rough look. 
I put it back in the frame and super glued some buttons on to give it some dimension. Simple. Easy.
Love it.

Tuesday, October 12, 2010

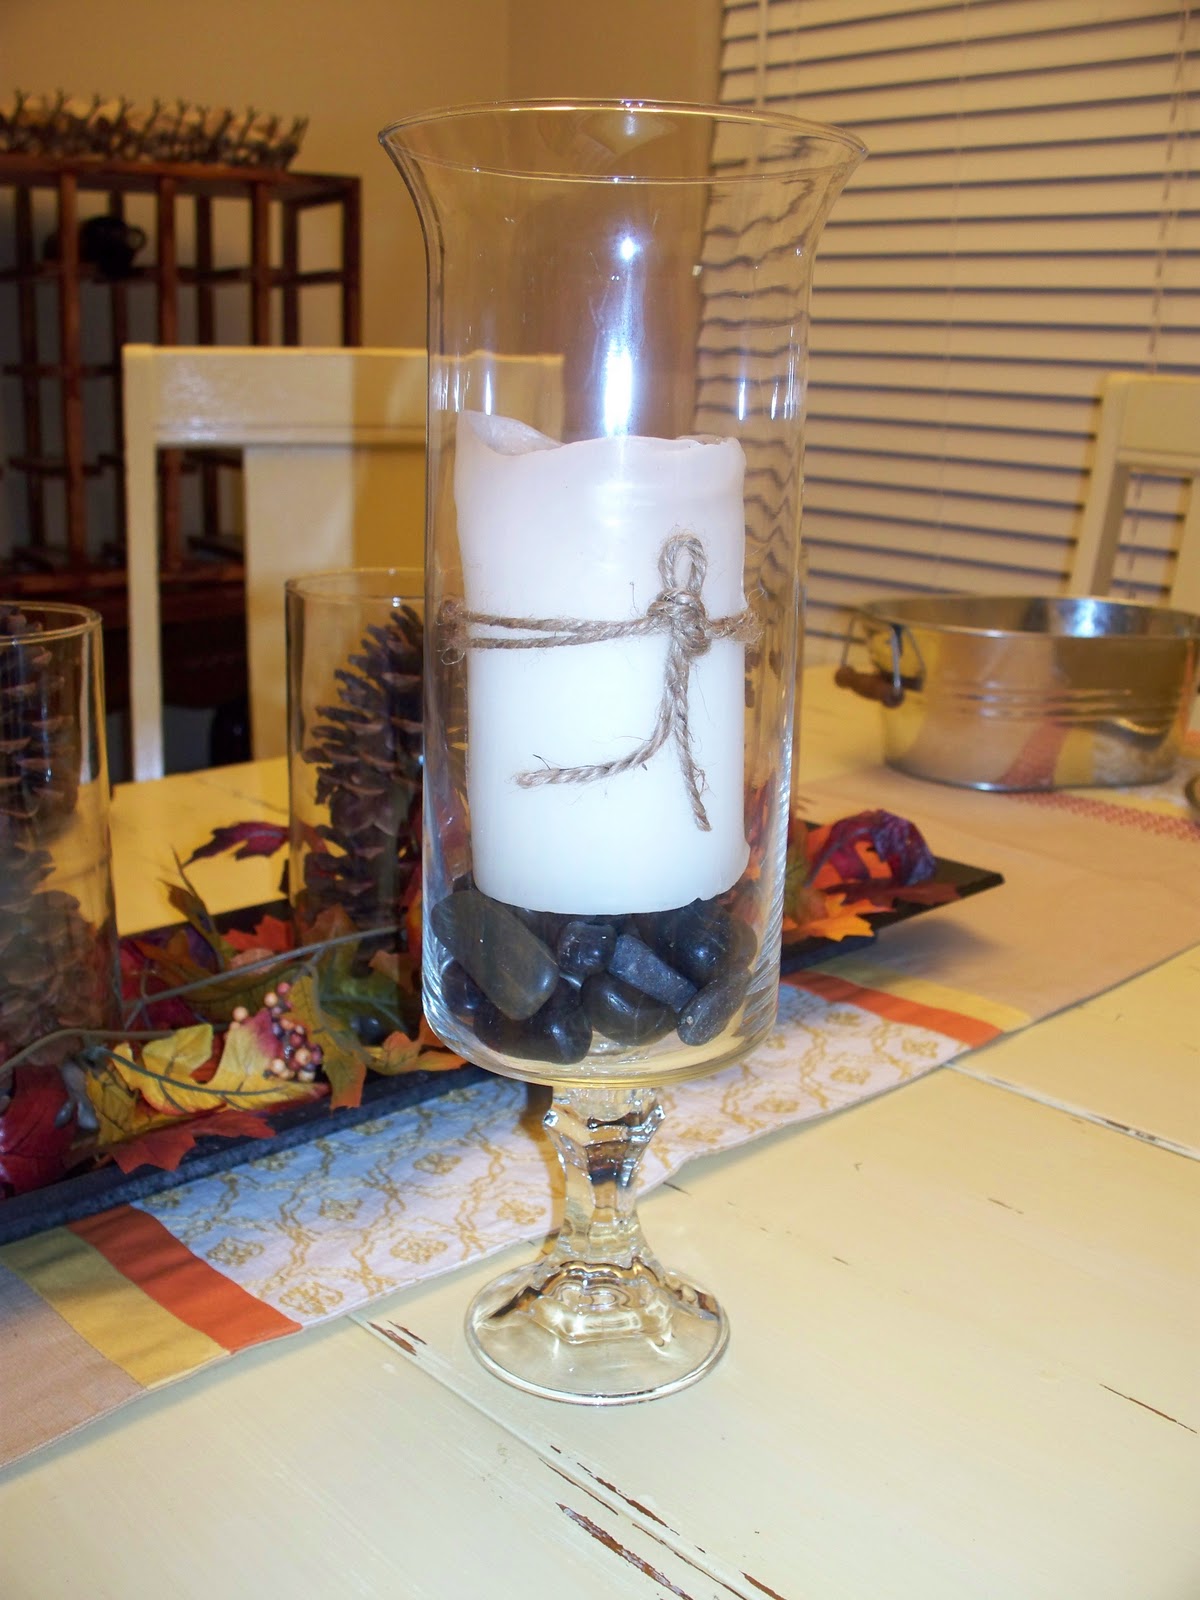
Dollar Tree Hurricanes

So I have been seeing these around the blogs. I'm not sure who originally posted the idea. If you do, let me know and I'll give them credit!
Dollar Tree is selling these glasses and candlesticks. $1 a piece, you can't beat that!
Add a strong adhesive to the bottom and you have a really expensive looking hurricane! The ones below are my Mom and sister's. For theirs we used the taller glasses also from Dollar Tree then mine in the picture above. 
Add some decorations to the inside and you have a really great looking piece, for $2!!

Monday, October 11, 2010

Fall Wreath for my Mom

My Mom wanted a Fall Wreath for her door so we headed to get our supplies.
We pulled the leaves off the stems and glued them on individually.
Then, we added some little foam beads in fall colors with the glue gun. It turned out cute! 
Happy Fall!

Sunday, October 10, 2010

Super Easy Project!

My Mom was in town this weekend, which really motivated me to do a bunch of projects that I had been wanting to do. This first one was SUPER easy, but it makes such a great look when it's all finished!
Using my Silhouette, I cut out vinyl letters in Georgia font. Stuck them straight onto some plates that I already had that matched my kitchen, and Voila! The hardest part of this project was making sure they were straight on the plate hangers and hanging them on the wall! 
I love them! They really add a pop when you turn the corner! Yay for fun easy projects!